Bought My Domain, Built My Site, and Branded My Links — Here’s How I Did It
- Stella Compra

- Oct 15
- 2 min read
Updated: Oct 22


🌐 Step 1: Buying My Domain on Namecheap
The first step to building any online presence is owning your name — literally!
I started by buying my domain, stellacompra.com, from Namecheap.
Why I Chose Namecheap:💰 Affordable pricing — domains renew at fair rates, and Whois privacy is free.⚙️ Simple dashboard — even if it’s your first time managing DNS, it’s easy to navigate.⚡ Quick setup — changes reflect faster compared to some registrars.
I searched for my domain, bought it, and it was active in minutes — smooth and beginner-friendly.
🧩 Step 2: My First Website Builder — Strikingly
At first, I connected my domain to Strikingly, a simple one-page website builder.
It’s great for beginners, portfolios, or landing pages — but as I kept designing, I wanted more creative control.
What I learned from Strikingly:✅ Perfect for quick, clean layouts.⚠️ Limited customization and animation options.💸 Upgrading for more features can get pricey.
After exploring Strikingly, I decided to move to something more flexible — and that’s when Wix changed the game.
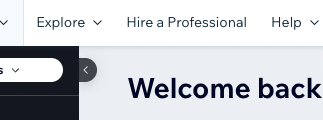
💻 Step 3: Moving to Wix for More Creative Freedom
Switching to Wix gave me exactly what I was looking for: freedom and creativity.
Why I Use Wix Now:🖱️ Drag-and-drop design — place anything exactly where you want it, no coding needed.🎨 Modern templates — a wide range of aesthetic and professional designs.✨ Animations and effects — add movement, transitions, or even video backgrounds.💵 Better value for money — more features for a lower price compared to others.
Once my site design was complete, I connected my domain from Namecheap directly to Wix.Within minutes, my website — stellacompra.com — was live!
🔗 Step 4: Creating My Branded Link Shortener with Short.io
To make my links look clean and professional, I set up a branded short link domain using Short.io.
My subdomain connected easily, and the free version is more than enough for beginners who want professional-looking links without paying extra.
👉 My branded link: this.stellacompra.com
Here’s how I set it up:
Now every link I share matches my brand — simple, consistent, and professional.
✨ Final Thoughts
This whole process — from buying my domain to building my site and creating branded links — taught me that you don’t need to be a tech expert. You just need curiosity, patience, and the right tools.
Here’s my exact setup:
Domain: Namecheap💻
Website Builder: Wix🔗
Link Shortener: Short.io
Now, both stellacompra.com and this.stellacompra.com are up and running — and it feels amazing seeing my brand come together step by step. 💫
If you’re just starting your online journey, take it slow. Every step you take brings you closer to creating something that’s truly yours. 🌿

Awesome! Ver informative :)